


How to use MailCatcher to test emails
February 22, 2024When you develop an application that sends emails, you typically need to test that the email has gone out. You also need to check the content of the email. Mailcatcher is a great tool for all of this, and it traps emails so you can be sure that you don't touch anything when you test to real users, and you can simply check the content on your computer. A great feature of Mailcatcher is that you can simply run it using the docker.
![]()
When developing and testing in a web application, he wants to fully test the process of sending emails and their content, but you run into two problems:
- you don't want to unnecessarily propagate email account credentials
- you don't want the emails to reach the user
If you want to send emails in the standard way it means, you have to configure the app somehow, to send emails through your mail server, which means that every developer will have access to send emails through your mailserver.
For example, you can address the situation by modifying the application so that emails don't leave. This will not cause you to accidentally send a test email to users and you don't need access to the mailserver for development. But again, you don't know if sending emails actually works. Also, you will then have a hard time checking the content of the email. Plus, it's completely pointless to modify the application.
A simple solution to such a situation is to use MailCatcher. You direct the sending of emails to MailCatcher, which can act as a mailer for receiving mail. And from the tested app, you can send everything by default without changes. In doing so, you can be sure that the user won't miss any email. You don't have to share access credentials to send emails. And you can easily view the contents of the email in detail.
I use MailCatcher for developing web applications. But you might as well use it when developing a desktop application, programming a console utility or just testing a tool that sends emails.
Using
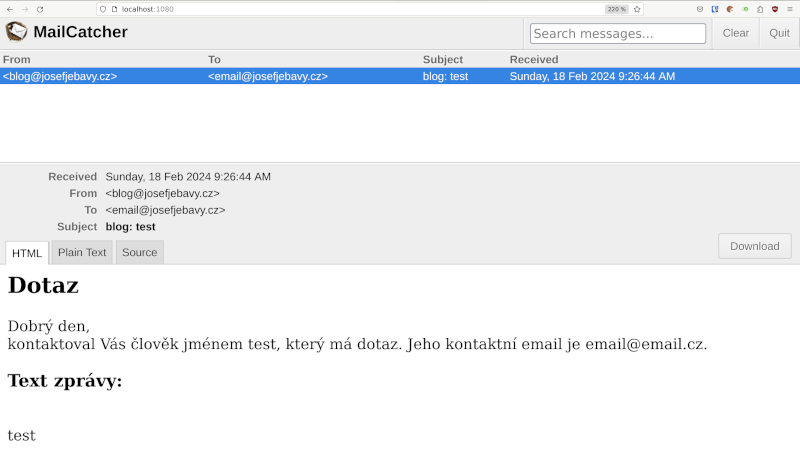
You build MailCatcher as a mailserver to your application. Subsequently, all sent emails are viewable in the MailCatcher web-based administration interface. In MailCatcher, you can view the email in its HTML version, in the so-called "plain text" version or view the full source code of the email and look at the email headers in detail.
What does MailCatcher look like?
This is a view of a captured email. Displaying the HTML version of the email:
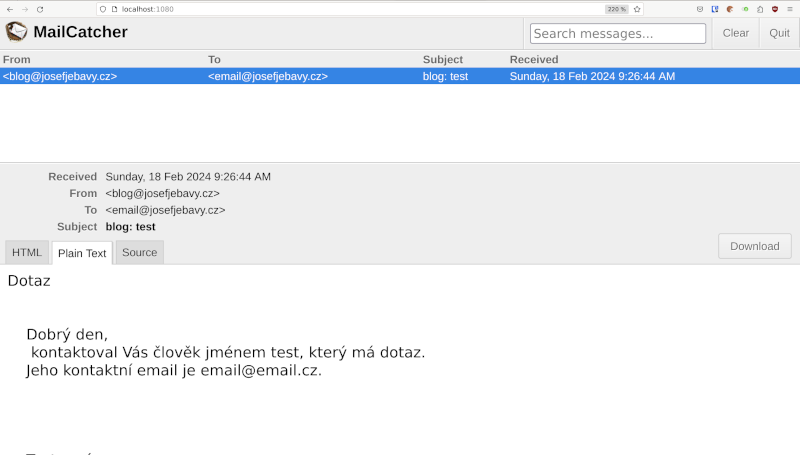
View the caught email and its plain text version:
View the source code of the captured email:
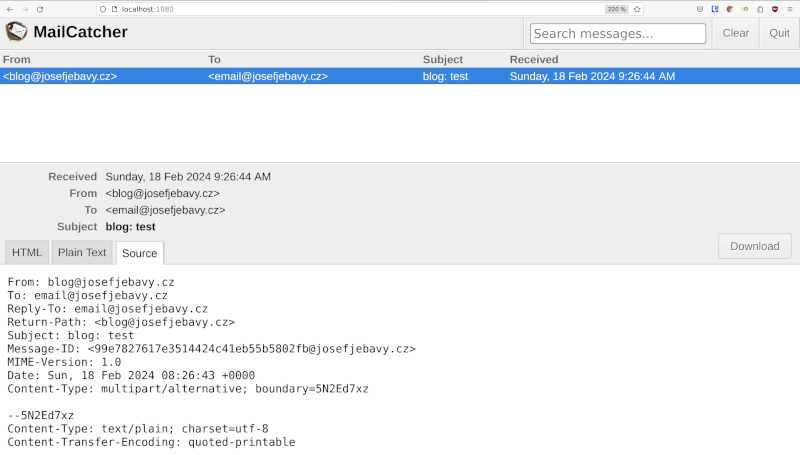
It is also possible to download the entire email as a source file - a file with the extension "eml".
Operating
You can run MailCatcher as a docker container.
Add the following lines to your docker-compose.yml
and MailCatcher will be downloaded and run when you start your development environment.
Mailcatcher:
  image: dockage/mailcatcher
  ports:
    - 1080:1080
Then at http://localhost:1080/
the MailCatcher web administration interface will now be available.
On port 1025 there is an SMTP server where you can send emails from your application.
Connecting to the application
Now you need to set up your application to use MailCatcher as a mailserver. I will show you how to modify the configuration if you are using PHP framework Nette or Symfony.
Symfony
If you use
the Symfony PHP framework
version 6 or 7
and Symfony mailer, then just add/edit the configuration file
.env.local
by one line:
MAILER_DSN=smtp://mailcatcher:1025
For details, see Symfony mailer.
Nette
If you use
the Nette PHP framework
the php function mail() is used by default,
which usually calls the sendmail system command.
Therefore, the configuration needs to be modified to use the SMTP protocol.
To send mail in Nette, you can use the \Nette\Mail\SendmailMailer class, which uses the mail() function.
For sending via SMTP, there is a \Nette\Mail\SmtpMailer class.
However, ideally use the \Nette\Mail\Mailer interface in your application code,
which Nette will prepare and configure according to the specified configuration.
And have this class passed by constructor or injected into the .
Add the following configuration to the neon configuration file:
mail:
	# use SmtpMailer
	smtp: true # (bool) default is false
	host: mailcatcher
	port: 1025
This edit sets the SMTP protocol to be used and the parameters for connecting to the SMTP server. Then, when using the \Nette\Mail\Mailer interface, Nette will pass you the configured \Nette\Mail\SmtpMailer class. and you can send emails directly.
For more details see Nette sending emails and Nette SMTP configuration.
Video tutorial
Video tutorial on how to get MailCatcher up and running and start using it with a web application,
which is programmed in the Symfony PHP framework:
Other solutions
Other solutions that can provide a similar service:
- Mailpit
- Maildev
- MailHog - development/maintenance complete
- Nextras Mail Panel - library for Nette
Email Delivery
Sending emails and delivering emails are two distinct, albeit related, actions that are successful for the functioning of emails. If you have a problem with email delivery, they fall into SPAM or don't arrive at all. You need to do a detailed email deliverability analysis and adjust your domain and mailserver configuration accordingly.
If you need a consultation or otherwise help with emails, Nette or Symfony feel free to contact me.
Articles on a similar topic
How to speed up the web
Rector: upgrade PHP application
Go programming language
Analysis of assignment and pricing of software project development
Python program to control Docker using the API
Python OpenAI API
Creating a WebSocket web application and setting up a proxy
Project management: agile software development
How to run old PHP applications
What a good programmer should know
Rust programming language
NodeJS: development, server configuration
Nette security bug CVE-2020-15227
REST API: platform API
Custom web and mail hosting with ISP Config software
Programming in SQL: PostgreSQL, MySQL/MariaDB
HTTPS: secure web
NoSQL database Mongo DB
Connecting to Microsoft SQL Server from Linux
What is the job description of a programmer
Python application localization
Which mail and web hosting to choose
Digispark - Program Atmel ATtiny microcontroller with Arduino IDE
Development for ARM processors with Arduino IDE
How to program the ESP8266 WiFi processor
What platform should I choose for my e-shop? For example, Prestashop
OpenStreetMap and GPS routes in the map on the web
Quickplay
Java Card OpenPlatform Contact and Contactless Chip Cards
Open smartphone with Linux - Openmoko Neo FreeRunner
Newsletter
If you are interested in receiving occasional news by email.
You can register by filling in your email
news subscription.
+